Setup
We will be using notebooks.azure.com for this lesson, this is a service which provides an environment for running Jupyter notebooks and managing your projects.
2.
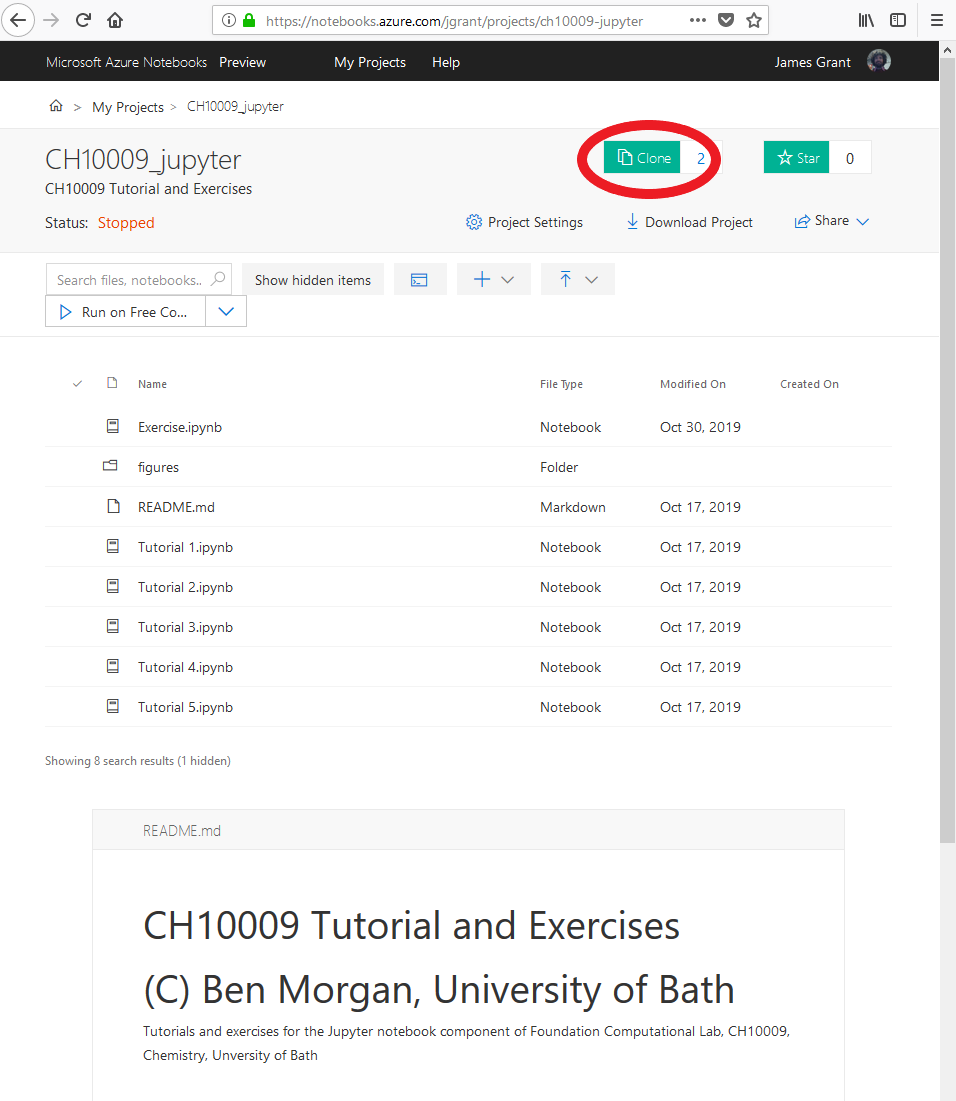
Next clone the library for your lab. Your lecturer will provide a link to this separately which will take you to a project page on notebooks on Azure. Click the Clone button in the top right corner:
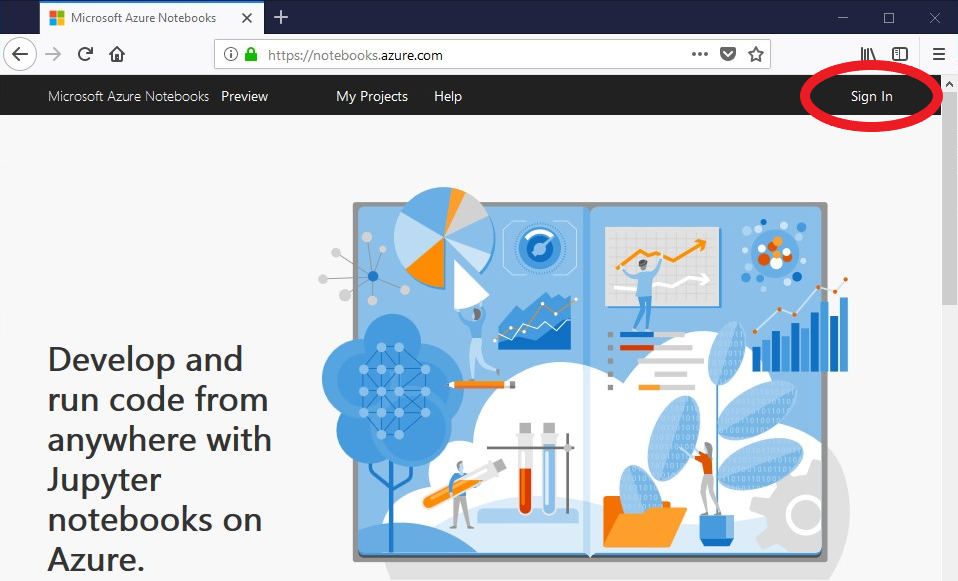
! If at this stage the clone button is faded out, you will see 'Sign In' in the top right corner you have not yet logged in and won't be able to clone the project Go back to step 1!
3.
This will open a pop up giving you the option to change the name of the project. You need to check the box saying that you trust the content. Note you should only do this if this has been provided with the link as part of your course or know the author. Then click clone:
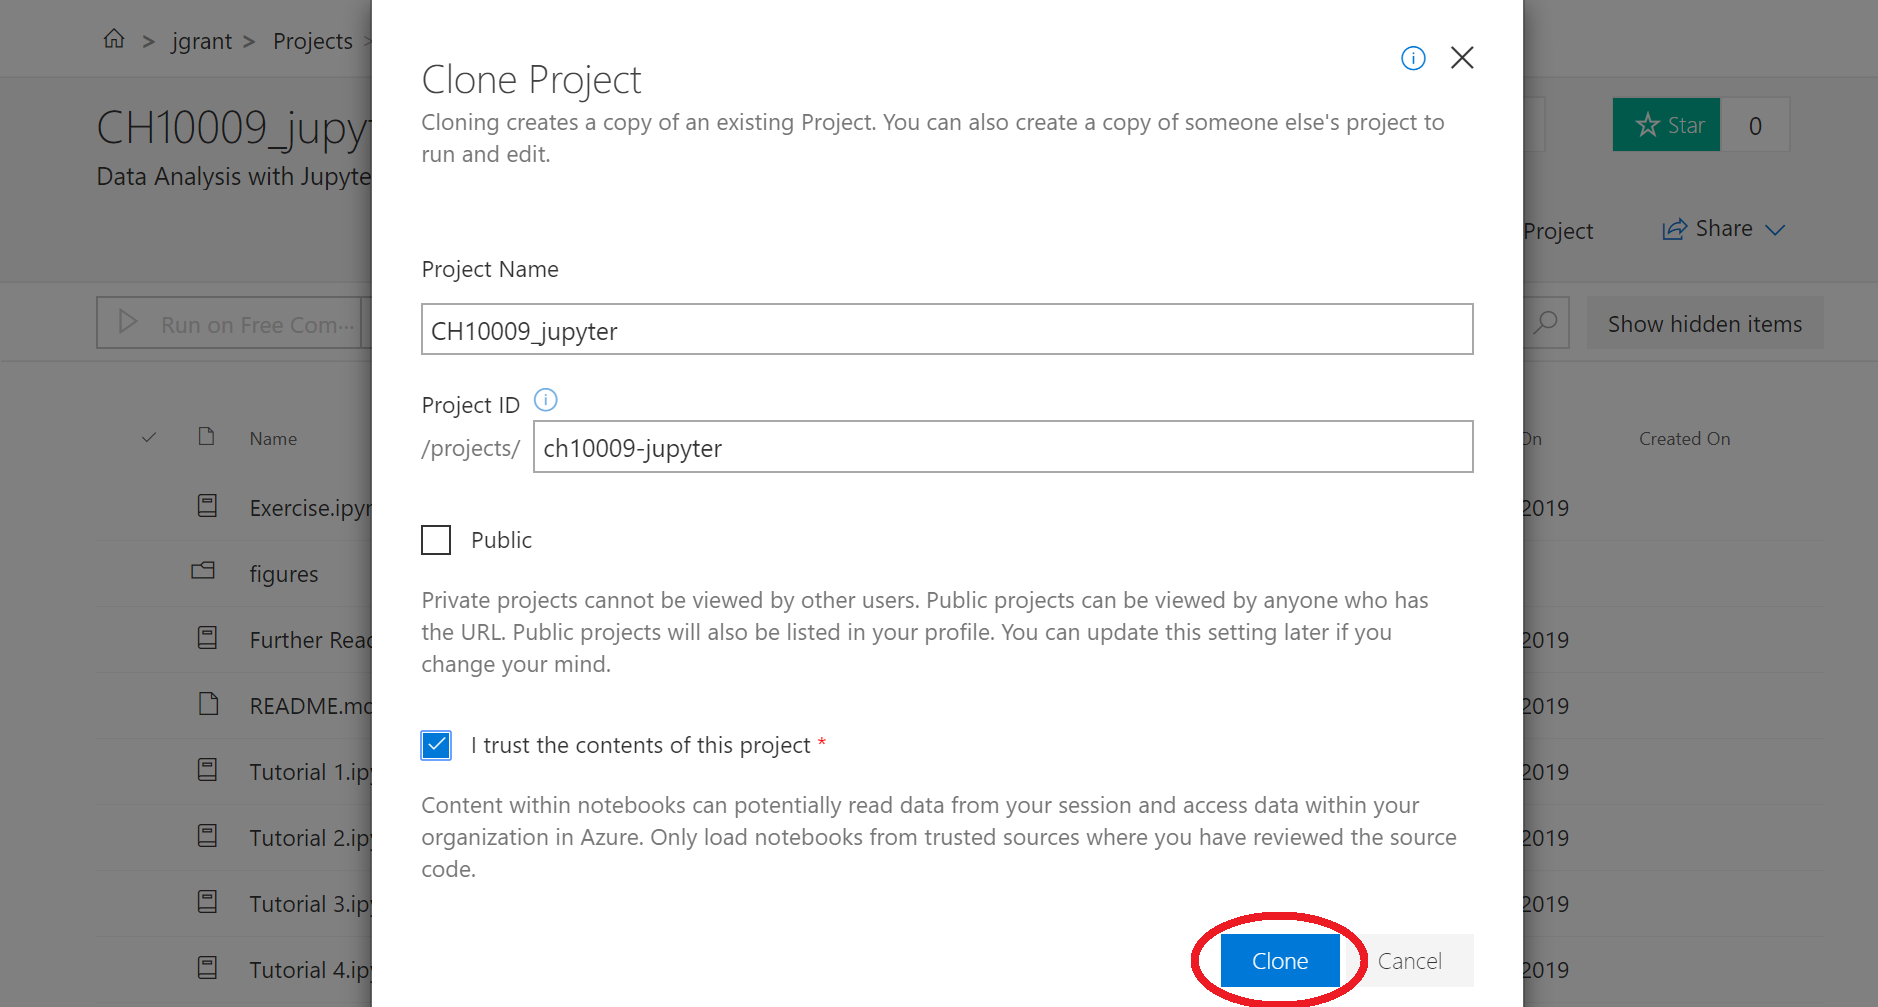
This will take a few seconds to make a copy of the project to your profile on notebooks.azure.com
4.
Once copied you should launch Jupyter notebooks by click the 'Run on Free Co(mpute)' button:
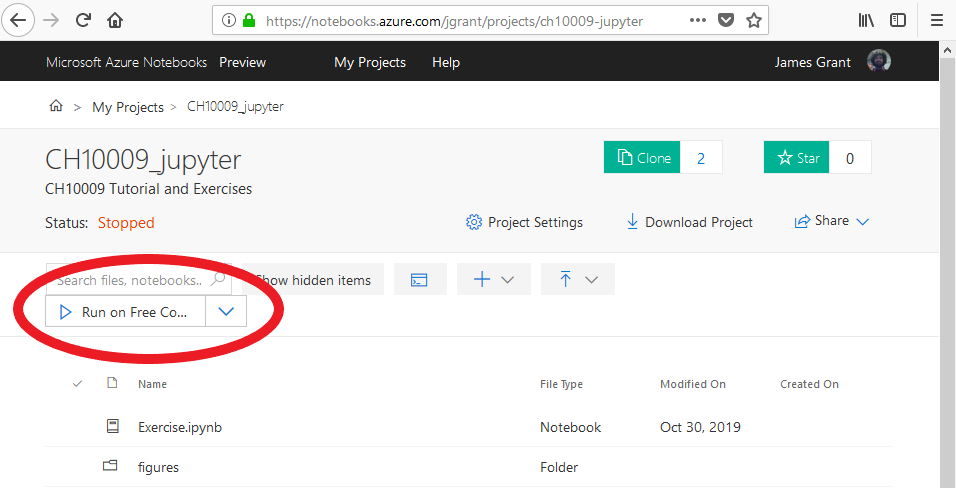
5.
Your Jupyter notebook is now running. You can open the tutorials and exercises by clicking on filename. If you want to create a new notebook you can do so by clicking on the 'New' button in the top right corner and 'Python 3.6':
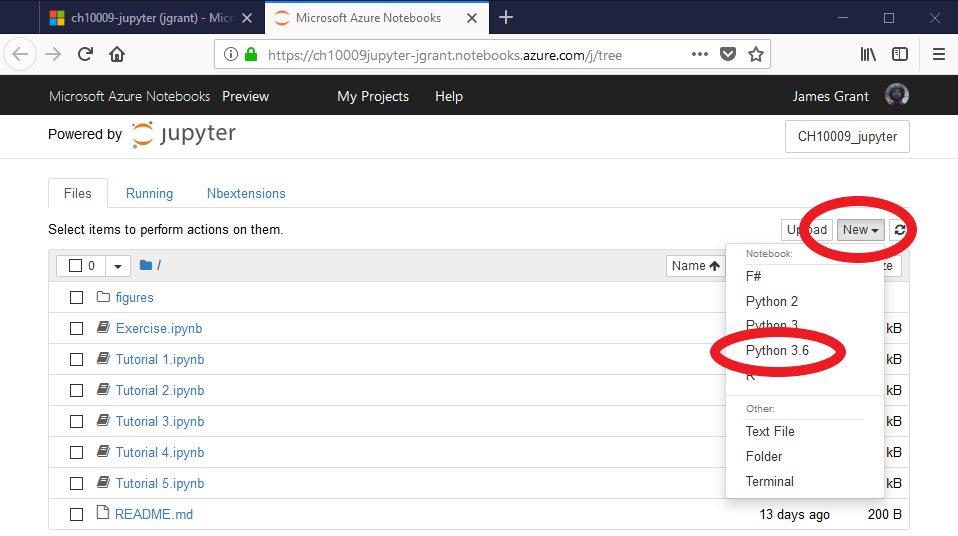
6.
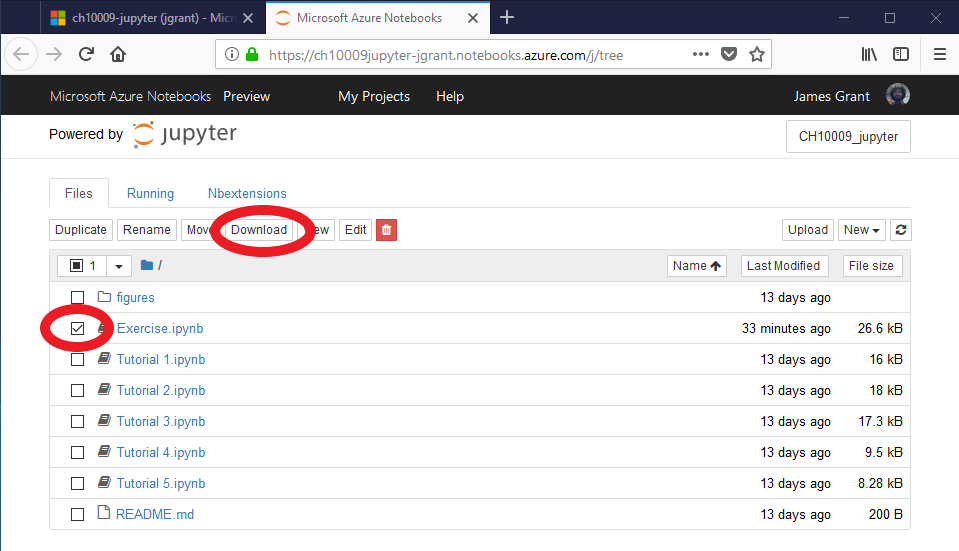
You may want to download your work to run locally e.g. using Jupyter notebook on your local machine or so you can submit it for marking! To do this go back to the initial Jupyter notebook page, select the check box alongside the file you wish to download. This will bring up a new menu with a download option:
